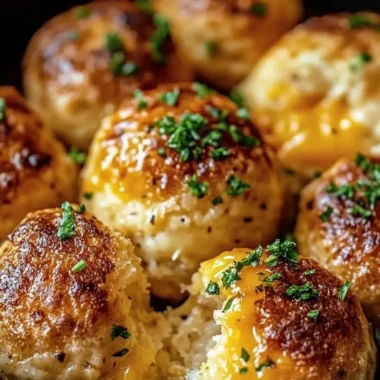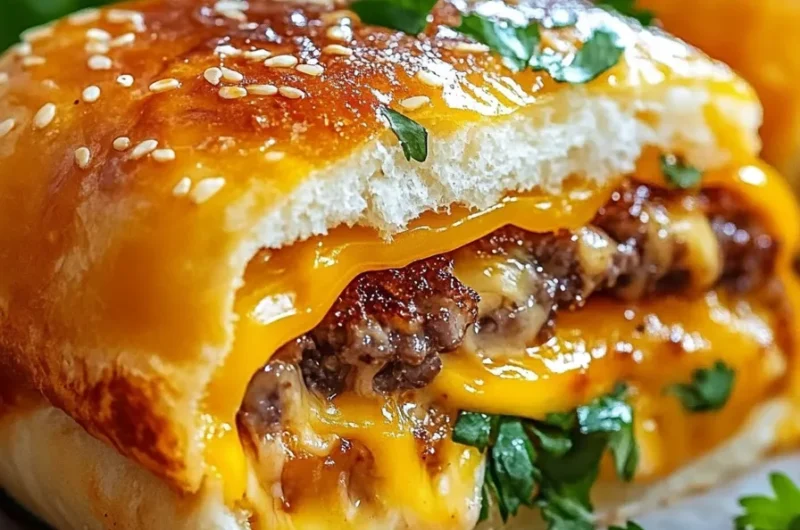
Irresistible Garlic Butter Cheeseburger Rollups are the ultimate comfort food that combines delicious flavors in a fun treat. Imagine tender beef seasoned just right, wrapped in soft bread, and drenched in buttery garlic goodness! These delightful rollups will take your taste buds on an unforgettable journey. Perfect for a family dinner, game night, or even as a snack, you’ll find everyone raving about these incredible bites.
This dish not only satisfies hunger but also brings joy to the dinner table. Each bite reveals a warm, cheesy core that melts into combined flavors of beef and garlic butter. As you prepare these rollups, picture smiles all around as they are devoured. With a blend of familiar ingredients, you’ll find this recipe surprisingly easy to make, and it’s sure to impress.
In this guide, we will explore everything you need to know about making the Irresistible Garlic Butter Cheeseburger Rollups, from preparation to serving suggestions. Let’s dive in and discover why this dish has become a family favorite for so many!
Why You’ll Love This Recipe
Irresistible Garlic Butter Cheeseburger Rollups are loaded with reasons to be your next culinary masterpiece. Here’s why you won’t be able to resist making them:
1. Flavor Explosion – The delightful combination of garlic butter and cheeseburger filling creates a burst of flavor in every bite.
2. Easy to Make – With straightforward ingredients and clear steps, even novice cooks can achieve impressive results.
3. Family-Friendly – Kids and adults alike will love the cheesy goodness wrapped in soft bread, making it a hit at family gatherings.
4. Perfect for Meal Prep – These rollups are excellent for making ahead of time. You can enjoy them fresh or reheat them for quick snacks.
5. Versatile Ingredients – Feel free to customize with your favorite toppings, like onions, peppers, or even BBQ sauce for a personal touch.
6. Affordable Ingredients – Made with everyday items, this recipe won’t break the bank and allows for quick batch cooking.
These features combine to create a dish that is sure to bring excitement to your kitchen. The flavors and textures meld beautifully, making it an unforgettable meal options.
Preparation and Cooking Time
Creating these mouthwatering Irresistible Garlic Butter Cheeseburger Rollups will take approximately 1 hour and 10 minutes from start to finish. Here’s a breakdown of the time required:
– Preparation Time: 30 minutes
– Cooking Time: 20-25 minutes
– Resting Time: 10-15 minutes
This timeline provides a great estimate to ensure everything runs smoothly while you’re whipping up these delicious rollups!
Ingredients
– 1 pound ground beef
– 1 teaspoon garlic powder
– 1 teaspoon onion powder
– 1 teaspoon salt
– ½ teaspoon black pepper
– 1 cup shredded cheddar cheese
– 1 can refrigerated crescent roll dough
– ¼ cup unsalted butter, melted
– 2 tablespoons fresh garlic, minced
– 1 tablespoon fresh parsley, chopped (optional for garnish)
Step-by-Step Instructions
Making Irresistible Garlic Butter Cheeseburger Rollups is easier than you might think. Follow these steps for success:
1. Preheat the Oven: Preheat your oven to 375°F (190°C) to prepare for baking.
2. Cook the Beef: In a frying pan over medium heat, add the ground beef. Cook until browned, breaking it apart with a spatula as it cooks.
3. Season the Beef: Once the beef is cooked, drain excess grease if necessary. Stir in garlic powder, onion powder, salt, and black pepper. Mix thoroughly and remove from heat.
4. Add Cheese: Mix in the shredded cheddar cheese while the beef is still warm, allowing the cheese to melt slightly.
5. Prepare the Dough: Open the can of refrigerated crescent roll dough. Unroll the dough onto a clean surface and separate it into individual triangles.
6. Fill the Dough: Place a spoonful of the cheeseburger mixture at the wider end of each triangle. Roll up tightly from the wide end to the narrow tip, sealing the edges as you go.
7. Brush with Garlic Butter: In a small bowl, mix melted butter with minced garlic. Brush the mixture generously over each rolled-up dough.
8. Bake: Transfer the rollups to a baking sheet lined with parchment paper. Bake in the preheated oven for 20-25 minutes or until golden brown.
9. Rest: Once finished baking, remove from the oven and allow the rollups to cool for about 10-15 minutes.
10. Garnish: Optionally, sprinkle with chopped parsley for added freshness and serve warm.
With these easy steps, you’ll be enjoying mouthwatering rollups in no time!
How to Serve
Serving Irresistible Garlic Butter Cheeseburger Rollups can enhance the overall experience for you and your guests:
1. Presentation: Arrange the rollups on a platter, using parchment paper or a decorative dish to elevate the look.
2. Dipping Sauces: Include a variety of dips such as ketchup, mustard, or even a tangy barbecue sauce to cater to different tastes.
3. Pair with Sides: Complement the rollups with simple sides such as a fresh salad, crispy fries, or vegetable sticks for variety.
4. Garnishes: Fresh herbs like parsley or chives sprinkled on top offer added color and flavor.
5. For a Casual Meal: Serve them alongside some fresh fruit or potato chips for a casual, laid-back meal.
By thoughtfully considering how you serve these rollups, you’re ensuring they are as delightful to see as they are to eat!
Additional Tips
– Experiment with Cheese: While cheddar cheese is delicious, try using Monterey Jack or Pepper Jack for a spicy twist and a flavor boost.
– Balance Flavors: Add a pinch of cayenne pepper or paprika to the beef mixture for a bit of heat.
– Rest the Rollups: Letting the rollups rest before serving not only enhances the flavor but also helps them hold their shape.
Recipe Variation
Switching up the ingredients can create exciting new flavors. Here are some variations to try:
1. Spicy Cheeseburger Rollups: Fold in jalapeños with the beef mixture for an extra kick.
2. Veggie-Loaded Rollups: Use a mixture of ground beef and sautéed vegetables like bell peppers and mushrooms for a heartier filling.
3. BBQ Cheeseburger Rollups: Mix in your favorite barbecue sauce into the beef before adding cheese for a sweet and tangy flavor.
Freezing and Storage
– Storage: Keep the rollups in an airtight container in the refrigerator. They can last about 3-4 days while remaining delicious.
– Freezing: For longer storage, freeze the baked rollups. Wrap them tightly in plastic wrap, and they will last up to 3 months. Reheat them in the oven until warm.
Special Equipment
To ensure your cooking experience is smooth, gather a few essential tools:
– Baking sheet
– Parchment paper for easy clean-up
– Frying pan for cooking the beef
– Mixing bowls for combining ingredients
– Pastry brush for applying melted garlic butter
Frequently Asked Questions
Can I use ground turkey instead of beef?
Yes, ground turkey works well as a leaner option while still retaining great flavors.
What if I don’t have crescent roll dough?
You can substitute the dough with puff pastry or even use flour tortillas for a unique spin.
Can I bake these rollups in an air fryer?
Yes, air frying them for about 10-12 minutes at 375°F can yield a crispy outer layer.
How do I serve leftovers?
Reheat them in the oven or microwave, and they can easily be paired with a fresh salad for a quick meal.
Are these suitable for meal prep?
Absolutely! These rollups can be prepped ahead of time and stored for quick lunches or snacks.
Conclusion
Irresistible Garlic Butter Cheeseburger Rollups truly bring excitement to the dinner table. The combination of seasoned beef, melted cheese, and buttery garlic is an unbeatable flavor affair. Quick to prepare and perfect for sharing, these rollups are not only delicious but also a fun way to enjoy classic cheeseburger flavors in a new format. Whether you’re making them for a family dinner, game night, or casual get-together, these rollups will leave everyone wanting more!
Irresistible Garlic Butter Cheeseburger Rollups: An Amazing Ultimate Recipe

- Prep Time: 15 minutes
- Cook Time: 20-25 minutes
- Total Time: 26 minute
Ingredients
– 1 pound ground beef
– 1 teaspoon garlic powder
– 1 teaspoon onion powder
– 1 teaspoon salt
– ½ teaspoon black pepper
– 1 cup shredded cheddar cheese
– 1 can refrigerated crescent roll dough
– ¼ cup unsalted butter, melted
– 2 tablespoons fresh garlic, minced
– 1 tablespoon fresh parsley, chopped (optional for garnish)
Instructions
Making Irresistible Garlic Butter Cheeseburger Rollups is easier than you might think. Follow these steps for success:
1. Preheat the Oven: Preheat your oven to 375°F (190°C) to prepare for baking.
2. Cook the Beef: In a frying pan over medium heat, add the ground beef. Cook until browned, breaking it apart with a spatula as it cooks.
3. Season the Beef: Once the beef is cooked, drain excess grease if necessary. Stir in garlic powder, onion powder, salt, and black pepper. Mix thoroughly and remove from heat.
4. Add Cheese: Mix in the shredded cheddar cheese while the beef is still warm, allowing the cheese to melt slightly.
5. Prepare the Dough: Open the can of refrigerated crescent roll dough. Unroll the dough onto a clean surface and separate it into individual triangles.
6. Fill the Dough: Place a spoonful of the cheeseburger mixture at the wider end of each triangle. Roll up tightly from the wide end to the narrow tip, sealing the edges as you go.
7. Brush with Garlic Butter: In a small bowl, mix melted butter with minced garlic. Brush the mixture generously over each rolled-up dough.
8. Bake: Transfer the rollups to a baking sheet lined with parchment paper. Bake in the preheated oven for 20-25 minutes or until golden brown.
9. Rest: Once finished baking, remove from the oven and allow the rollups to cool for about 10-15 minutes.
10. Garnish: Optionally, sprinkle with chopped parsley for added freshness and serve warm.
With these easy steps, you’ll be enjoying mouthwatering rollups in no time!
Nutrition
- Serving Size: 8 rollups
- Calories: 340 kcal
- Fat: 22g
- Protein: 18g